Full pattern design created by Colleen Hays with YarnWars.com
![]()
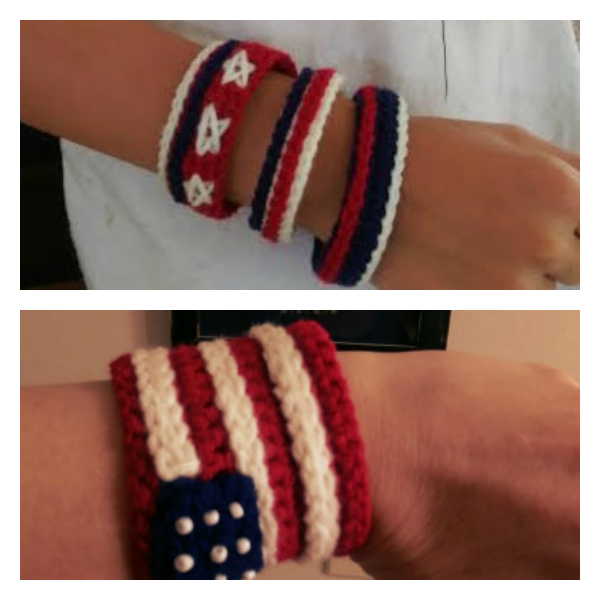
With the 4th of July holiday around the corner, why not work up a few of these quick and easy bracelets! A great way to show your patriotism by wearing the colors of the flag, loud and proud on your wrist! Why not make a couple for the ankles while you’re at it!
The smaller bracelets can be made in only a matter of minutes and the cuff works up super quick as well!
Click Here for Video Tutorial on Bracelet
Click Here for Video Tutorial on Larger Cuff Bracelet
Supplies Needed:
F- Hook
Any yarn you like! Red, White & Blue (I used Red Heart Super Saver and Caron, but cotton would be great for this project as well.) Remember however, the yarn weight you choose will determine how many more or less chains you will need to make for your starting chain.
Scissors
Blunt Needle (to hide your tails)
Techniques Used in Pattern:
Sc – Single Crochet
Hdc – Half Double Crochet
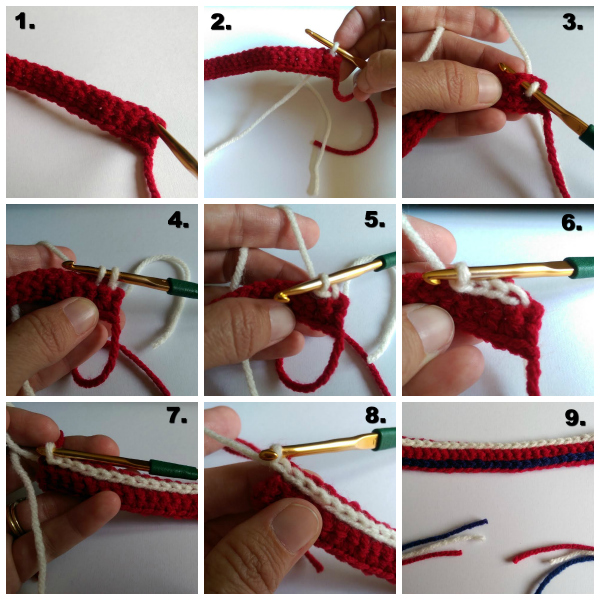
Straight Stitch (Term I am using for a series of slip stitches worked in a particular fashion, similar to the basic sewing machine stitch. You will hear me refer to it as the human sewing machine in the video tutorial.) Images below: Straight Stitch Video Here!
![]()
Pattern for smaller bracelet:
Starting with any of the 3 colors for the base of bracelet,
Chain 18 – 24 (Child) Chain 28 – 32 (Adult)
(Leave approximately 6” tail)
(Starting chain range will vary depending on size of wrist. Measure around wrist for proper fit. Ends of bracelet should just meet, not overlap.)
- Sc into 2nd chain from hook and every chain after to the end.
- Ch 1, turn, work sc into 1st st and every stitch after to the end.
Repeat row 2 for a total of 3 or 5 rows not including starting chain. You should end on opposite end of beginning tail.
Leave approximately 6” tail. Finish off.
- Choose your 2nd color & work the Straight Stitch across either the top or bottom row of stitches. Chain 1 past your last stitch made. (Shown in image 8 above) Finish off.
- Choose your 3rd color & work the Straight Stitch across the opposite of the last row of Straight Stitches or just below or above the last row of Straight Stitches (This is where you get creative!)
At this point, you should have 3, 6” tails on each end of your bracelet. One in each color. You can simply tie off and slide your hand in the bracelet, or you can try a variation of close offs such as the adjustable as shown in the video HERE (Adjustable not recommended. Does not work well with the 6 total strands.)
Click on the next page for the Larger Cuff American Flag Bracelet pattern!
![]()