FREE Crochet Shamrock Pattern!
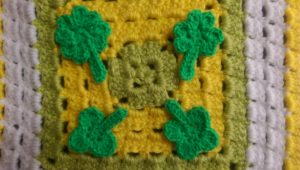
With Saint Patrick’s Day just around the corner, it’s time to bring in a little Luck o’ the Irish! What better of a way to do this than to add a little 3 or 4 leaf clover/shamrock to your St. Patty’s Day creation!
This is such an easy to work up shamrock, you will have it comlete in only a few minutes! I hope you enjoy!
This pattern was designed by Colleen Hays with YarnWars.com.The pattern is being offered free for personal use. Whatever you choose to do with your final creation from this pattern is your choice.
If you enjoyed my little Shamrock design and pattern, please help spread the word by letting others know where they can find the pattern, either at YarnWars.com, Our YarnWars Facebook Page, or by directing others to our YouTube tutorial on this. Thanks so much everyone! ~Colleen
LETS GET STARTED!
Supplies you will need:
- Yarn – Green (Any brand, flavor, your choice!)
- G-Hook – (You can use whatever hook size you need to obtain the size desired. The video tutorial was done with a G hook and you can see the size that came from this in the picture below.)
- Scissors
- Blunt needle
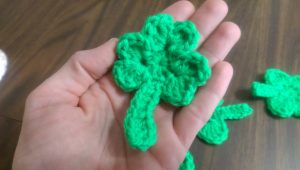
Size sample of shamrock worked with G-hook
Technique Videos:
- Magic Circle Video
- There is a full video tutorial for this Shamrock Pattern available on our YouTube Channel. Click here to crochet along if you like!
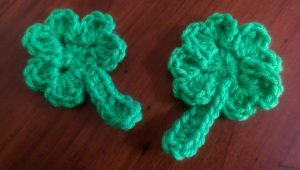
**I have written 2 different methods to this pattern. The first will give you the heart shaped shamrock leaves, the 2nd will give you round leaves.**
Pattern: (Heart Shaped Leaves)
(Quick tip before getting started! If you are struggling with the space between the leaves, if it is too close quarters for your liking, add 1 hdc for each leaf into your 1st round. Example: 3- leaf clover, work 12 hdc into MC instead of 9, and for 4- leaf clover, work 15 hdc into MC instead of 12)
- Create a Magic circle, ch 1, work 9 hdc in circle for a 3 leaf shamrock or work 12 hdc into circle for a 4 leaf clover, join to the 1st hdc.
- ch 2, work the following into the same as ch 2 sp, *1 dc, 2 treb, 1 dc, sl st, ch 2, 1 dc, 2 treb, 1 dc, sl st.* Everything between the asterisk in 1 stitch.. it will be a bit tight!)
- By putting this many stitches into 1 stitch, you end up hiding the next stitch to where you can barely see it… slip into next 2 visible stitches.
- ch 2, work the following into the same as ch 2 sp, 1 dc, 2 treb, 1 dc, sl st, ch 2, 1 dc, 2 treb, 1 dc, sl st. (You have just repeated step 2).
5 – 6. Repeat step 3 then 4 once more, ending with a slip stitch in the next visible stitch following your last leaf.
You will repeat above step once more for a 4 – leaf clover!
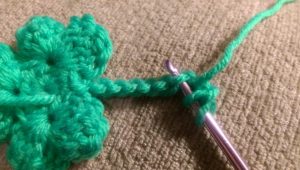
- Ch 9, turning your chain row slightly toward you, (you will be looking at the back of the chain row), work 1 dc into the 3rd & 4th spine segments on the back of the chain, work 1 hdc into the remaining stitches on the backside of the chain. You will have made a total of 7 stitches (2dc & 5 hdc), slip into the same as the ch 1 space in the beginning leaf.
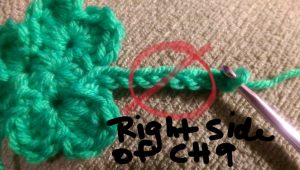
This is not the side you want to work on!
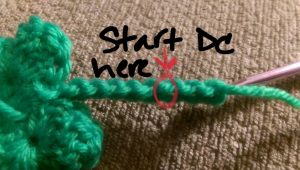
This is the backside of the chain. You do want to work on this side starting in the spine segment circled above.
Example of 1st dc being worked into that 3rd spine segment.
Finish Off.
For any areas that may be confusing, please refer to our video tutorial linked above where we have created the heart shaped shamrock, you can also come join us at our Facebook group at YarnWars Group on Facebook to get some quick help and join an awesome and amazingly talented group of people and pick up more fun free patterns!
Click on page 2 for the round leaved Shamrock!
No Responses