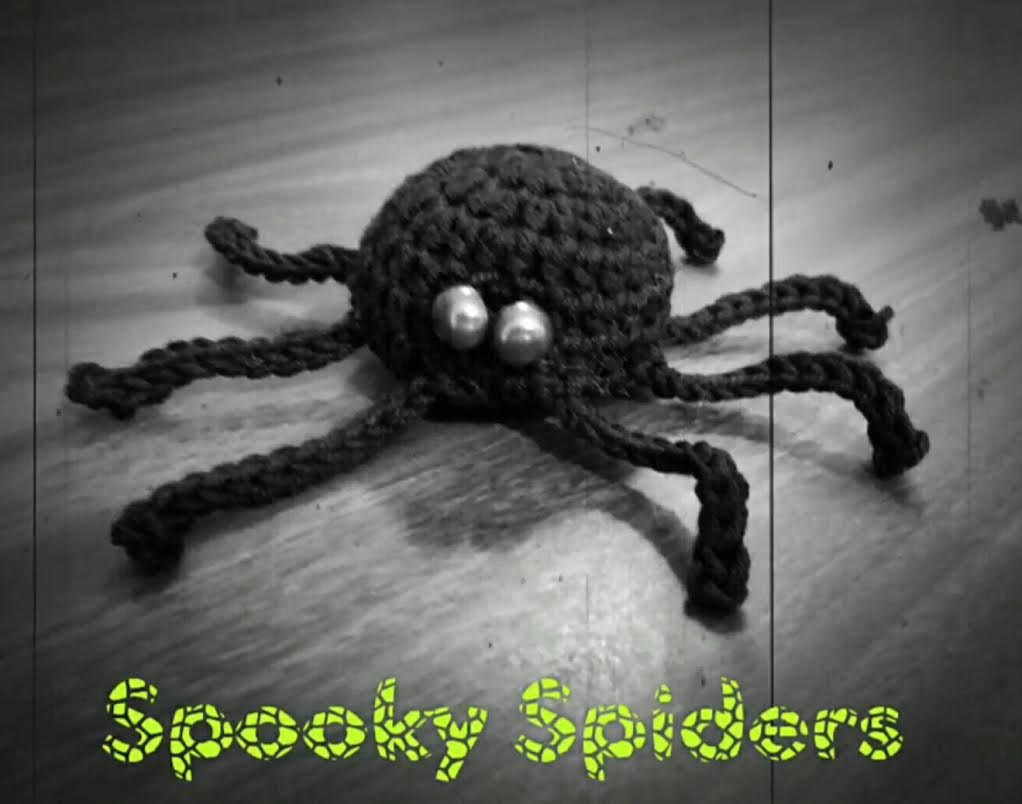
 Pattern Design by Colleen Hays with YarnWars.com
(Pattern terms located at end of pattern)
FULL VIDEO TUTORIAL AVAILABLE! CLICK HERE!! (Video includes both stuffed spider in beginning and treat bag section at end)
Supplies you will need:
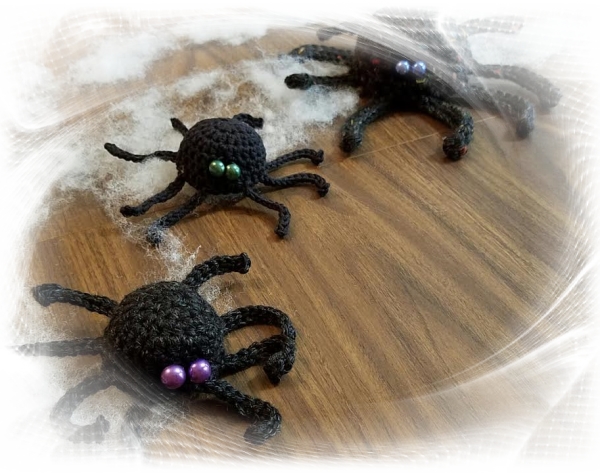
–Any type of yarn you would like. I would suggest a lighter weight yarn to make a smaller spider (small treat bag size- will hold a couple of tootsie rolls or Hershey kisses) I used Lions Brand Heartland in video, you can use another type such as Redheart Super Saver, but it will make your spider a bit larger.
–E hook was used in video tutorial. Again, this depends on the size spider and or treat bag you are looking to make.
–Scissors
–Blunt needle
–Stitch Marker
–Stuffing if making for décor, candy or small toy if making for treat bag.
–Buttons or sequence for eyes (optional) You can also stitch on eyes if preferred.
______________________________________________
Techniques used in this pattern:
Mc – Magic Circle – This is a prep step to work your stitches through in the beginning of a project. There is not a very simple way to explain this, there is, however, a video tutorial available for this technique.
If you are not comfortable with the MC, you can alternatively start your project by chaining 3, slip stitch into the 1st chain worked, then work your beginning stitches into the circle made.
Hdc – Half Double Crochet– (Yarn over, insert hook into stitch, draw yarn through, yarn over, draw through all 3 loops on hook.)
Sl St – Slip Stitch– (Insert hook into stitch, yarn over, draw yarn through stitch then through 1st loop on hook.)
Blo – Back Loop Only– (Work only into the back loop of your stitch)
Flo – Front Loop Only– (Work only into the front loop of your stitch)
Increase – Working multiple stitches into 1 stitch. (In this pattern, you will work 2 hdc into increase stitches.)
Decrease (Hdc) – Working over 2 stitches to make into 1 stitch. Yarn over (YO), insert hook into 1st st, YO draw yarn through, insert hook directly into next st, YO, draw yarn through. YO, draw through all 4 loops on hook.
____________________________________________
Note: When you see Repeat ** in pattern, work in exact order what is between ** until you reach end of a round.
Pattern
Work this project in continuous rounds, do not chain up, do not join unless stated in pattern.
- Create a MC, work 8 hdc into circle. (8)
- Increase by working 2 hdc into each stitch around. (16)
- 1 hdc in 1st stitch, increase in next. *1 hdc in next st, increase in next* Repeat ** around, ending with increase in last st (24)
- 1 hdc in ea stitch around (24)
- 1 hdc in ea stitch around (24)
- LEGS ROUND – *1 hdc in 1st stitch Flo (front loop only). chain 14. Slip stitch into 3rd chain from hook and into ea chain back down the leg to the body. When you’ve reached the base of the chain where it meets the body, work hdc into next stitch to rejoin on body (following previous Flo stitch made). Work 1 hdc into next st,* – Repeat ** until you have worked 8 total legs. (24) (Each leg should be evenly spaced over 3 stitches)
- (Note: This round you will work Blo only in chain leg stitches.) 1 hdc Blo in 1st stitch, 1 hdc in next 2 st, *1 hdc in Blo of next st, 1 hdc in next 2 st*. Repeat ** ending with 1 hdc in last 2 st of round. (24) (STOP HERE AND READ INFORMATION AFTER STEP 10 IF MAKING TREAT BAGS. If you are just making this for Halloween décor, continue onto 8.)
- *1 hdc in 1st st, hdc decrease over next 2 st* Repeat ** to end. START STUFFING. (16)
- Hdc decrease over 2 stitches around to end- 8 total decreases (8)
- If possible, work 2 more decreases (shown in video) to shrink final hole, then join, hide final tail by stitching around center stitches and closing up final gap.
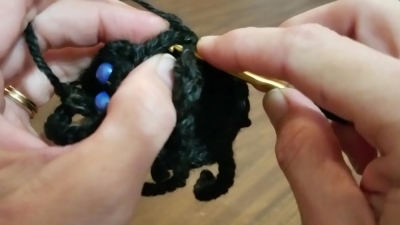
If working treat bag spider, STOP & join at end of round 7, work your eyes in between a pair of legs. Your legs should be equally spaced, so your eyes can be worked between any 2 legs.
Spooky Spider Treat Bag Video Tutorial Starts by Clicking Here!
(Link above will only take you to that particular section of video tutorial, after you’ve created spider body and turning it into treat bag. You will have to go back in video for full spider tutorial.)
For the Spooky Spider Treat Bag, work your spider as noted above until you reach end of round 7. Join.
Working a separate piece, aside from body, work rounds 1 through 3 of spider pattern above creating a flat circle which will be the bottom closure of your treat bag, join with slip stitch at end of round 3 leaving tail of approximately 14 – 16” in length.
Position flat circle made, to bottom of spider body. Stitch flat circle around leaving approximately a 2” opening for treat insert. (A simple method for this, after completing round 3, stitch together flat circle to spider body starting from the 2nd leg left from the eyes around to the 2nd leg to the right of the eyes. You can make the gap smaller if you feel it is too big by stitching up a bit closer to the 1st leg from either side of the eyes on the spider.
The video gives a couple of examples for closures of the treat bag, it also offers a more clear direction for this area of the project.
Img 1: Attaching bottom of treat bag to spider body.
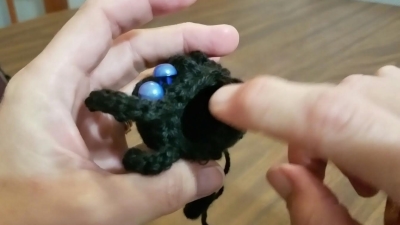
Img 2: shows gap for treats (can be made smaller)
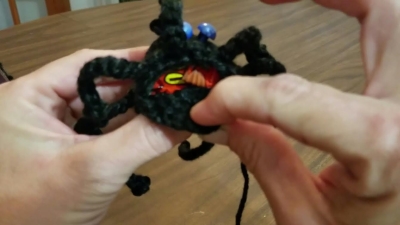
Img 3: Stuffing spider with treats!
I hope you have enjoyed this YarnWars Power Hour Project!
The video links are all included above and will quickly and easily help you through this simple project =)
Thanks so much for your interest in my pattern!
Visit us in our Facebook group today! Tons of great free pattern downloads, awesome support and an all around amazing group of talented yarn crafters from around the world!
Pattern Terms
This pattern is being offered free to the public for creation purposes. Selling the written pattern itself is strictly prohibited, altering or modifying this pattern for distribution purposes is strictly prohibited. This does not mean you cannot change the pattern for your own personal use! You may not change the pattern to distribute or share it as your own in your community or any other venue. Whatever you choose to do with your end product is your choice. There was a lot of time and effort that went into creating this pattern to make available free to the public. If you plan on sharing this pattern with your group, members or friends, please refer to the original designer of this pattern Colleen Hays with YarnWars.com. Link to pattern please, do not post copy of this pattern to your website, group, or any other venue.
Thank you so much!
![]()