FULL VIDEO TUTORIAL FOR THIS TECHNIQUE
2 quick notes to begin:
- Photos for each step are larger in the printable pdf available for this technique which can be found in the Files tab just below the timeline photo in the YarnWars Facebook group
- In the video, I start by working the opposite way on the back square to make sure squares are aligned properly in the end, but if you work the 1st 2 steps below, you don’t have to start the same as video. The difference is, in the method below, we are working on the back square, 1 stitch before the stitch we work on the front square. Either way works fine. (If you are not working along with video – disregard this note =) )
__________________________________
Begin by matching same sides of square together, either wrong side against wrong side, or right side against right side.
Make sure that when you are working through top stitches, you are working just in and through, not deep into stitches.
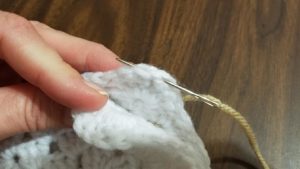
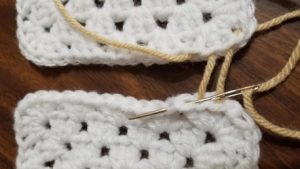
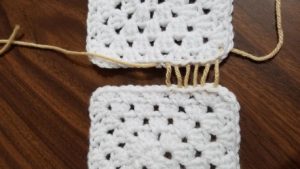
Insert needle just into and through top of stitch on back square at corner chain space as seen in image above.

Insert needle just into and through top of stitch on front square working through the 1st dc stitch as seen in image above.
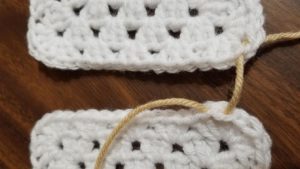
Your starting stitches should resemble photo above.
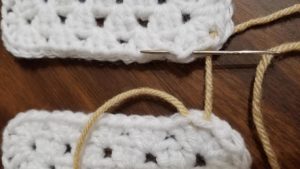
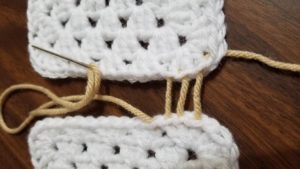
Next, working from 1 square to other, go into next stitch working only into top and through to other side of stitch as seen in picture above.

Your squares should now resemble photo above.
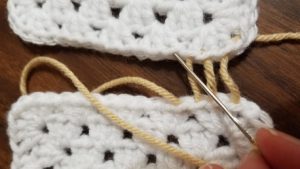
Repeat on opposite square, working just into top and through next stitch as seen in photo above.
Your project should now resemble photo above.
You will continue across to next square.
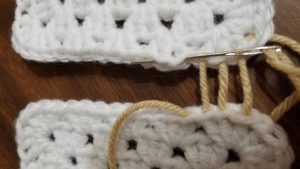
(Continued from photo above)
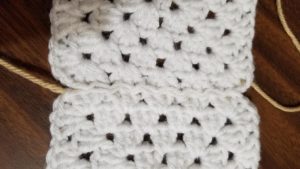
And work back and forth (as if you are lacing your shoes!) and when you reach the half way point, you will take both ends of your yarn strand, on left and right side, and pull tightly all strands together until closed.

Project will resemble photo above after pulling strand of yarn tight.
Continue your work as you have throughout until you reach the end just before the corner chain 1 at opposite end of square. Photo above shows right side of project. Notice there is no visible contrast yarn.

Photo above shows back side of project.

If you feel like you have not aligned your squares properly, or have some need to start over, you simply grab one end of your strand of joining yarn as shown in photo above.
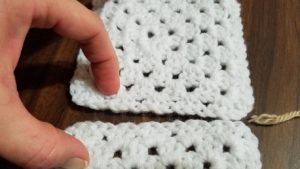
Pull tightly to slide through and separate your squares!
____________________________________________
That’s it folks! It is that easy.
This join will not take any longer than other joins, it gives you a completely invisible join and allows you to work, worry free through projects that require you to attach different color squares together!
I hope this invisible granny square join technique has been helpful to you, if you have enjoyed this tip, please consider subscribing to my channel for more great tips and tricks and of course free patterns that I offer both on my YouTube channel
Our YarnWars Facebook group, where you will have the opportunity to meet new like minded yarn crafters from around the world, get and offer support along with tons of free patterns!
You can LIKE our Facebook page if you are just interested in being alerted to new projects and updates….
And of course, as always, you will find all of our patterns on our YarnWars website!
HAPPY YARNING FRIENDS!!